|
in part 2 of this tutorial, we take our max 5 step sequencer to the next level by adding transport, note length and tempo controls functions
|
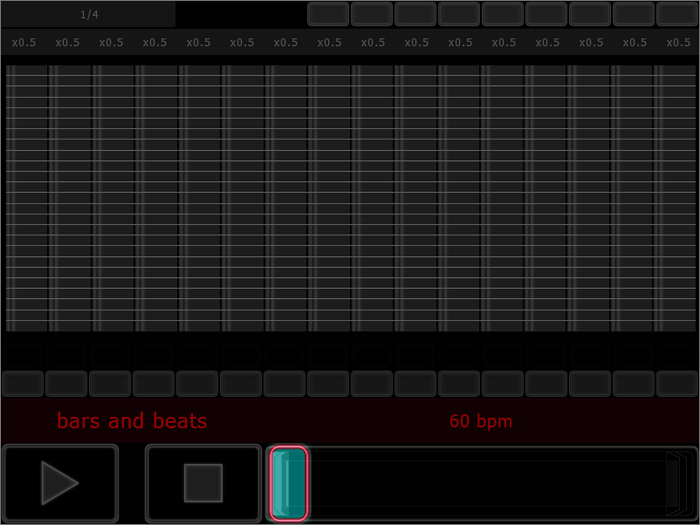
The first incarnation of our Lemur/Max/Live step sequencer is still pretty basic (see part 1 of this tutorial). So let’s pimp the beast, add some bling and cool features to it. The idea now is to be able to lift our hands from Live and focus on the Lemur only, and to do that we’ll add transport and tempo controls. While the first version basically only triggered our chosen note, this time we’ll also add the possibility to control note length for each step in the sequence. Last but not least we’ll also dive into the new Lemur v2 “multilabel” feature to add dynamic text to each sequencer step, displaying current note value. Let’s have a look at our basic step sequencer in action, and see what’s in store for us in part 2:
|

|

|
|
Now let’s give some of our pimp love to the Max patch:
- Green is the new red
Of course you noticed that all the sub patches and comments in the original Max patch (step_seq_tutorial.maxpat) were colored in red. For easy viewing all new components and changes are now marked in green in the pimped patch (step_seq_tutorial_pimped.maxpat). Start Live (to make it rewire master, remember?), then Max, then load the pimped patch.
Don’t forget to switch frequently between this tutorial and the actual Max patch. Whenever you want to dig deeper into something, right-click an object to bring up Max’s help.
- Transport control
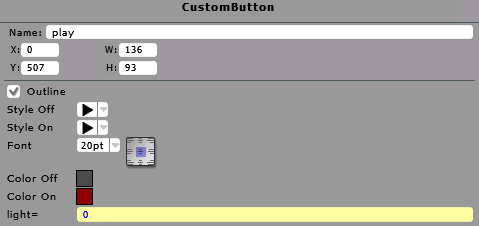
So we added a play and a stop button to our lemur interface. Let’s get the data from those into Max and then further on to the Rewire transport control.
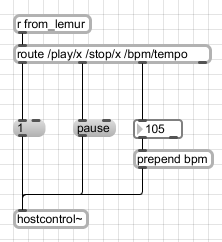
By now you know how the route object helps us sorting out only the relevant OSC streams from the Lemur. In this case data from play button, stop button and tempo fader. Whenever data comes through from the play button (and it only does when you touch it, not when you let go. Remember?) a ‘1’ message is triggered and passed on to the hostcontrol~ object. This way Max tells its Rewire host (Live) to start playing. In the same way we use the ‘pause’ message to tell Live to stop playing.
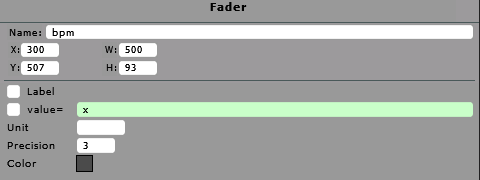
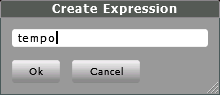
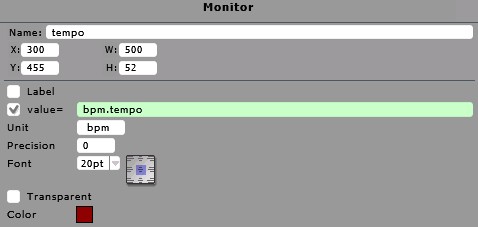
The integer from the tempo expression from the Lemur is passed through and the prepend object makes a message that hostcontrol~ can use to control the tempo of the Rewire host.
- Please tell me where I’m at !
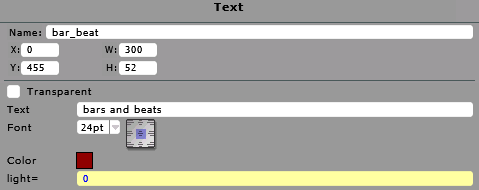
Remember the hostsync~ object that we used in our first patch to get timing data from the Rewire host? We’re going to use that object again. This time to extract the bars and beats from song start and then send that information to the Lemur to display.
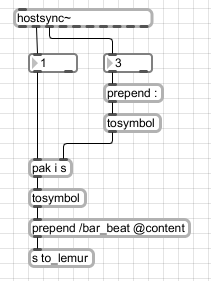
Outlet 2 and 3 shows bars and beats respectively. By using the prepend object we’re adding a colon before the number of beats. Then the pak object combines everything to a list and the tosymbol object makes the list into a symbol that the content attribute of the Text object on the Lemur can understand.
- How long is a step ?
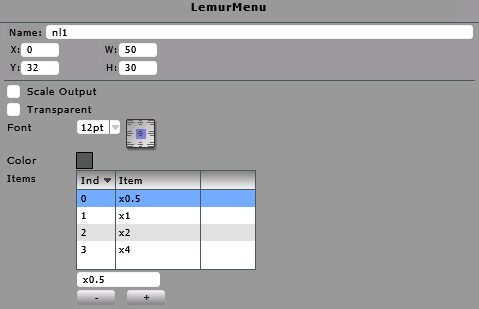
By packing the output all of our 16 LemurMenu objects into a list, we can do some smart calculations to get the note lengths in ticks.
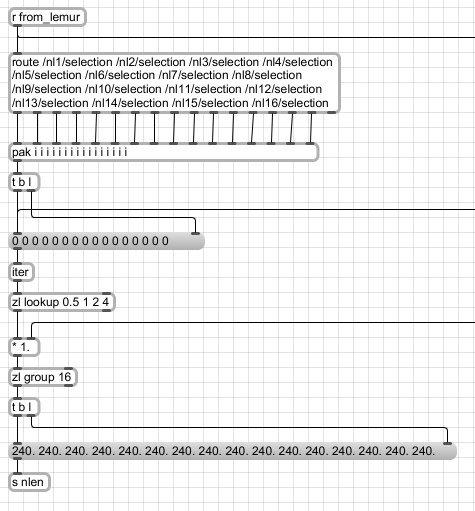
The pak object collects all 16 values (from the 16 LemurMenus) and makes a list of integers. Following that is a zl lookup object to replace the 0-3 values with actual factors for multiplication. But what is it that should get multiplied? We have to go back to the grid division – decided by the LemurMenu from our first interface – and convert those values to ticks (i.e. a 16th note is 120 ticks).
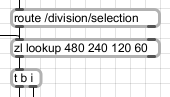
Another zl lookup object is used to replace the grid division selection to ticks.
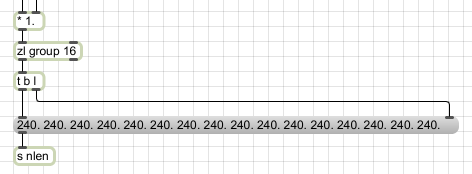
Once everything is multiplied a new list of 16 is compiled with the zl group object and then sent on to the updated sequencer sub patch via the s nlen object.
br>
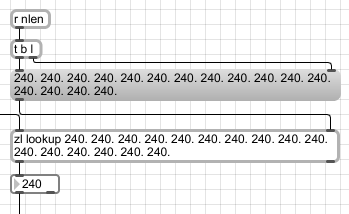
In the sequencer sub patch the list of note lengths is received and then fed into the zl lookup object. The ticks_coming_through sub patch feeds the current step count and retrieves the corresponding note length. This is then fed further on into the makenote object. Almost magically a note with correct pitch, velocity and length is sent to our soft synth in Live.
- Pitch awareness
It’s hard to see what pitch we are at only by looking at each slider height. Here’s the remedy.
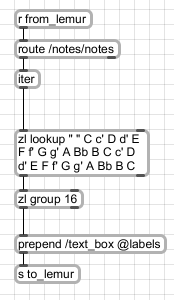
Data from the notes MultiSlider on the Lemur is coming through the route object as a list. This list is broken up via the iter object and then each list component is replaced by the equivalent position in the zl lookup object. For example, if the slider is all the way down (i.e. sending a 0), that position is replaced by a blank space (” “). On the other hand if an individual slider is on the fifth position an ‘E’ is passed on. The zl group object mounts everything back to a list of 16 which is then sent to the ‘labels’ attribute of our Pad area on the Lemur. Nifty.
When you feel confident and understand what each part of the patch is doing, we’d encourage you to have a go at these challenges:
– Change the pads handling accents to a multislider giving the full velocity span from 0 to 127.
– Add a choice of more step lengths – all the way up to x16. Maybe via some odd ones as x3 and x6.
– Expand the number of grid divisions. Start with whole notes and add triplet notes as well.
Done? Now try to make something from scratch and share it with your fellow Lemur users!
- Credits
Mika?l Bj?rk –
|
|